Quantcast
Channel: VBForums - CodeBank - Visual Basic 6 and earlier
Viewing all 1321 articles
Browse latest View live

Move a control from one tab to another at run-time on the SSTab control

$
0
0
It took me a bit to figure this out, and I see a bit of interest in the SSTab control, so I decided to post this. It's a procedure that allows you to change the tab of a control that's on the SSTab control at run-time.

Code:


Public Sub ChangeTheSSTab(SSctl As Control, ctl() As Control, OldTab As Long, NewTab As Long, Optional bRestoreTheTab As Boolean = False)
    ' Hide the form with the SSTab before doing this.  This will prevent flicker if you're moving several controls.
    ' You must get the OldTab correct or everything blows up. Alternatively, this procedure could have "found" it, but that wastes time.
    ' This procedure does NOT work in form_load, but it DOES work in form_activate.
    ' Also, when using this, don't forget to deal with the TabIndex if you need to !!!!
    Dim OrigTab As Long
    Dim i As Long
    '
    If bRestoreTheTab Then OrigTab = SSctl.Tab
    '
    SSctl.Tab = OldTab
    For i = LBound(ctl) To UBound(ctl)
        If TypeName(ctl(i)) = "Line" Then
            ctl(i).X1 = ctl(i).X1 - 75000
            ctl(i).x2 = ctl(i).x2 - 75000
        Else
            ctl(i).Left = ctl(i).Left - 75000
        End If
    Next i
    SSctl.Tab = NewTab
    For i = LBound(ctl) To UBound(ctl)
        If TypeName(ctl(i)) = "Line" Then
            ctl(i).X1 = ctl(i).X1 + 75000
            ctl(i).x2 = ctl(i).x2 + 75000
        Else
            ctl(i).Left = ctl(i).Left + 75000
        End If
    Next i
    '
    If bRestoreTheTab Then SSctl.Tab = OrigTab
End Sub

It's usage is fairly straightforward, at least to me. :)

Here's an example (in a Form_Activate procedure):

Code:

    Dim ctl() As Control
    '
    ' Change the SSTab of the controls.
    ReDim ctl(1 To 3)
    Set ctl(1) = txtRight1
    Set ctl(2) = txtRight2
    Set ctl(3) = txtRight3
    ChangeTheSSTab tabExamData, ctl(), 4, 2

The SSTab control is named tabExamData. There are three controls moved from tab #4 to tab #2 on the SSTab control. The position on the tab won't change, but the actual tab the controls are on will change. The ctl() is an array of controls so I can move several controls at once. This speeds things up.

Enjoy,
Elroy

VB6 - JACMAIL 2.5 - Email c/w Encryption

$
0
0
JACMail Version 2.5 is very similar to Version 1 on the surface. Under the hood however, there have been substantial changes. JACMail is an Email Client Program designed to allow fast and efficient recovery of email from a POP3 server, and the sending of email through an SMTP server. It is primarily oriented towards text based messaging with attachments, and does not directly support highly formatted HTML based email or embedded objects. It receives and stores both text/plain and text/html messages, and Web based emails (HTML) can be sent to your default browser for viewing. It also supports Plain Authentication based POP3 and multiple mailboxes. The mailboxes are stored in an Access database utilising ODBC.

The code uses IP Version independent system calls, so it will only work on Windows systems that actively support both IPv4 and IPv6. That more or less restricts it to Windows Vista or later. It has been tested on Windows Vista, Win 7, Win 8.1, and Win 10, and utilises the following standard components and references:
RICHED32.DLL
RICHTX32.OCX
COMDLG32.OCX
MSSTDFMT.DLL
MSBIND.DLL
MSADODC.OCX
MSDATGRD.OCX
which the user must have available in order to compile the program. It also uses a VB6 compiled Library file called jCrypt.dll, which is available here:
http://www.yellowhead.com/documents/jCrypt.dll
This DLL handles all the Cryptography functions, and should be copied to the %windir%\system32\ directory (%windir%\syswow64\ on 64 bit systems).

JACMAIL Version 2.0/2.5 both support message encrytion. Version 2.0 utilized RC4 for bulk encryption, which is no longer considered secure. It also used RSA to transfer the key from the server component to the client component. Version 2.5 now uses ECC (Elliptical Curve Cryptography) to transfer the encryption key. The advantage of using ECC is that keys do not need to be stored, as a different key is used every time. Even if a hacker manages to break the ECC key for one message, it is useless for the next message. Version 2.5 uses a proprietary method of encryption, and for the moment will remain so. Although any JACMail2 Client can receive and decrypt messages sent by JACMail2, the sending of encrypted messages requires a server component.

1. Sender creates Key. For example:
E2 18 F8 A9 78 C7 B4 57 5A 59 42 AE 86 D6 55 59
B7 D4 A4 10 F8 AE 79 B9 52 F0 2B 2E C1 56 43 56
All keys are 256 bit.

2. Sender encrypts the message (not including message header), and encodes the encrypted message using Base64 (eg. rIhJjXo+Shn15tj7RxHPwZiEpcGNyg==).

3. Sender then forwards the encrypted/encoded message as text (not flagged as encoded), and sends the key and the Message-ID to the server to be stored in a database.

4. Receiver retrieves the message, sees that it is encoded, and initiates decryption.

5. If the sender Domain recovered from the Message-ID (eg <41827.5099189815@key.domain.com>) is contained within the list of known encryption sources that the program keeps track of, then this step is skipped. Otherwise the receiver app displays the list of known encryption sources along with the current one, and the receiver is prompted to add it to the list with a warning. This step provides a degree of protection against phishing with encrypted messages.

6. At this point, both the sender and the receiver possess the encrypted message and the sender possesses the encryption key. The receiver then connects with the Domain Name from the Message-ID on a specified port, and sends the Message-ID and it's Elliptical Curve Public Key to the server.

7. The sender server looks up the Message-ID, and recovers the associated encryption Key. It then creates an Agreed Secret using it's own private ECC Key and the public ECC Key from the receiver. The encryption key is encrypted with the Agreed Secret and sent back to the receiver along with it's own public ECC Key. It then records the IP address and date/time used to recover the key. This step provides a degree of protection against the contents of the message being modified. Subsequent requests from non-authorized addresses are ignored.

8. The receiver creates the Agreed Secret using it's own private ECC Key and the public ECC Key from the server. This Agreed Secret is used to decrypt the encryption key from the server, which is then used to decrypt the Base64 decoded message. Finally, the key is saved in the receiver's database.

9. Subsequent requests to decrypt the message use the saved key.

10. The sender now knows when the message was read. Subsequent requests for the key would be highly suspicious and are blocked, with manual intervention required to unblock. If it is later discovered that an unauthorized request was made for the key from an unknown IP address, the contents of the message have probably been compromised.

Critics will say that the message could be intercepted, and the Msg-ID sent to the server to recover the Encryption Key. That is true, but one of the drawbacks of most encryption systems is that it is difficult to determine when it has been compromised. JACMail 2.5 overcomes that limitation.

Note: The service component requires the Microsoft NT Service Control (NTSVC.ocx).
Attached Images
 
Attached Files

API based random number generator for VB6

$
0
0
The built-in one in VB6 isn't all that good at creating highly random numbers (at least for cryptographic purposes). The crypto API is much better at this. Below is some sample code that you can put in a module that will let you use the Microsoft CryptoAPI random number generator.

Code:

Private Declare Function CryptAcquireContext Lib "advapi32.dll" Alias "CryptAcquireContextA" (ByRef phProv As Long, ByVal pszContainer As String, ByVal pszProvider As String, ByVal dwProvType As Long, ByVal dwFlags As Long) As Long
Private Declare Function CryptReleaseContext Lib "advapi32.dll" (ByVal hProv As Long, ByVal dwFlags As Long) As Long
Private Declare Function CryptGenRandom Lib "advapi32.dll" (ByVal hProv As Long, ByVal dwLen As Long, ByRef pbBuffer As Any) As Long

Private Const PROV_RSA_FULL As Long = 1
Private Const VERIFY_CONTEXT As Long = &HF0000000


Public Function GenRandom(ByVal ptrMemory As Long, ByVal lenMemory As Long)
    Dim hProv As Long
    CryptAcquireContext hProv, vbNullString, vbNullString, PROV_RSA_FULL, VERIFY_CONTEXT
    CryptGenRandom hProv, lenMemory, ByVal ptrMemory
    CryptReleaseContext hProv, 0
End Function


I use actual numerical pointers passed ByVal, instead of something like "ByRef MyArrayFirstCell As Byte" because the ByRef alternative would require passing it something specifically Byte-type and if I had a Long-type array (or any other type) it wouldn't work, and I can't use ByRef As Any with VB functions (it only works with DLL functions). This allows it to access ANY kind of variable to be used for holding the memory, with the one caveat that you will need to use VarPtr to get the actual memory address of the variable, in order to pass it to this function.

Refresh Windows of the IDE

$
0
0
This is a piece of code I wrote a while back to solve the annoyance of VB6 not always correctly repainting its various windows when another program's window moves off of them.

For years, I've just kept a shortcut to this program on my taskbar, and I click it anytime VB6 windows need a repaint.

To use it, just create a project with one module and no forms. This program just executes its Sub Main and then it's done.

I use it all the time, so I thought I'd share.

Code:

Option Explicit
'
Private Declare Function EnumWindows Lib "user32" (ByVal lpEnumFunc As Long, ByVal lParam As Long) As Long
Private Declare Function RedrawWindow Lib "user32" (ByVal hwnd As Long, lprcUpdate As Any, ByVal hrgnUpdate As Long, ByVal fuRedraw As Long) As Long
Private Declare Function OpenProcess Lib "kernel32" (ByVal dwDesiredAccess As Long, ByVal bInheritHandle As Long, ByVal dwProcessId As Long) As Long
Private Declare Function EnumProcessModules Lib "psapi" (ByVal hProcess As Long, lphModule As Long, ByVal cb As Long, lpcbNeeded As Long) As Long
Private Declare Function GetModuleFileNameEx Lib "psapi" Alias "GetModuleFileNameExA" (ByVal hProcess As Long, ByVal hModule As Long, ByVal lpFileName As String, ByVal nSize As Long) As Long
Private Declare Function GetModuleBaseName Lib "psapi" Alias "GetModuleBaseNameA" (ByVal hProcess As Long, ByVal hModule As Long, ByVal lpFileName As String, ByVal nSize As Long) As Long
Private Declare Function CloseHandle Lib "kernel32" (ByVal hObject As Long) As Long
Private Declare Function GetWindowLong Lib "user32" Alias "GetWindowLongA" (ByVal hwnd As Long, ByVal nIndex As Long) As Long
Private Declare Function GetWindowThreadProcessId Lib "user32" (ByVal hwnd As Long, lpdwProcessId As Long) As Long
'
Private Const RDW_INVALIDATE = &H1
Private Const PROCESS_ALL_ACCESS = &H1F0FFF
Private Const GWL_STYLE As Long = (-16)
Private Const WS_VISIBLE = &H10000000
'
Dim lTheProcessIdMatch As Long
Dim hWndCount As Long
Dim hWnds() As Long
'

Private Sub Main()
    Dim hWindows() As Long
    Dim i As Long
    '
    hWindows = hWndOfAllTopLevelWindows
    For i = 1 To UBound(hWindows)
        If WindowIsVisible(hWindows(i)) Then
            If LCase$(ExeFileName(hWindows(i))) = "vb6.exe" Then
                RedrawWindow hWindows(i), ByVal 0&, ByVal 0&, RDW_INVALIDATE
            End If
        End If
    Next i
End Sub

Private Function EnumWindowsCallBack(ByVal hwnd As Long, ByVal lpData As Long) As Long
    ' Only the API calls this.  It should not be called by user.
    '
    ' This callback function is called by Windows (from the EnumWindows
    ' API call) for EVERY window that exists.  It populates the aWindowList
    ' array with a list of windows that we are interested in.
    '
    EnumWindowsCallBack = 1
    '
    If lTheProcessIdMatch = 0 Or ProcessId(hwnd) = lTheProcessIdMatch Then
        hWndCount = hWndCount + 1
        If UBound(hWnds) < hWndCount Then ReDim Preserve hWnds(1 To UBound(hWnds) + 100)
        hWnds(hWndCount) = hwnd
    End If
End Function

Private Function hWndOfAllTopLevelWindows(Optional lProcessIdMatch As Long = 0) As Long()
    '
    ' The EnumWindows function enumerates all top-level windows
    ' on the screen by passing the handle of each window, in turn,
    ' to an application-defined callback function. EnumWindows
    ' continues until the last top-level window is enumerated or
    ' the callback function returns FALSE.
    '
    ' This can also be done with GetWindows, but this is more reliable and with less risk of crashing because of windows destroyed while looping.
    lTheProcessIdMatch = lProcessIdMatch
    hWndCount = 0
    ReDim hWnds(1 To 100)
    EnumWindows AddressOf EnumWindowsCallBack, &H0 ' Doesn't return until done.
    If hWndCount > 0 Then
        ReDim Preserve hWnds(1 To hWndCount)
    Else
        Erase hWnds
    End If
    '
    hWndOfAllTopLevelWindows = hWnds
End Function

Private Function ExeFileName(hWndOfInterest As Long, Optional FullSpec As Boolean = False) As String
    Dim rtn As Long
    Dim lProcMods() As Long
    Dim sFileName As String * 260
    Dim lSize As Long
    Dim lRequired As Long
    Dim hProcess As Long
    Dim hWndOfFormWithFocus As Long
    Dim l As Long
    '
    lSize = 4
    ReDim lProcMods(0)
    '
    hProcess = OpenProcess(PROCESS_ALL_ACCESS, 0&, ProcessId(hWndOfInterest))
    ' Enumerate modules.
    rtn = EnumProcessModules(hProcess, lProcMods(0), lSize, lRequired)
    ' If array is not large enough to hold all results, number of bytes required is in lRequired.
    If lRequired > lSize Then
        lSize = lRequired
        ReDim lProcMods(0 To (lSize / 4) - 1)
        rtn = EnumProcessModules(hProcess, lProcMods(0), lSize, lRequired)
    End If
    ' lProcMods() now holds the list of module handles associated with the process.
    ' The zeroth element is the main program.
    If FullSpec Then
        rtn = GetModuleFileNameEx(hProcess, lProcMods(0), sFileName, Len(sFileName))
    Else
        rtn = GetModuleBaseName(hProcess, lProcMods(0), sFileName, Len(sFileName))
    End If
    ExeFileName = Left$(sFileName, rtn)
    rtn = CloseHandle(hProcess)
End Function

Private Function WindowIsVisible(hWndOfInterest As Long) As Boolean
    WindowIsVisible = ((GetWindowLong(hWndOfInterest, GWL_STYLE) And WS_VISIBLE) = WS_VISIBLE)
End Function
   
Private Function ProcessId(hWndOfInterest As Long) As Long
    ' This process ID is unique to the entire application to which the window belongs.
    ' A process ID will always be unique for each running copy of an application, even if more than one copy is running.
    Dim lProcId As Long
    Call GetWindowThreadProcessId(hWndOfInterest, lProcId)
    ProcessId = lProcId
End Function

[VB6] Code Snippet: Drag drop any format to other apps without custom IDataObject

$
0
0
While I've got a thread going about how to do this the right way and actually implement an IDataObject, in the mean time I thought I'd post a trick that you can use to dragdrop any format without one.

Normally, to drag text to another app, you'd have to create an implementation of IDataObject in a class, then implement all its methods and support CF_TEXT and/or CF_UNICODETEXT and others you wanted. However, if you were just looking to copy files with CF_HDROP, you may have seen my other project where there's an API that does this for you-- SHCreateDataObject. There's not a direct equivalent for any other CF_ format, but it turns out that you can call that API without actually specifying a file, and still get back a fully functional default IDataObject from Windows instead of rolling your own custom one, which you can then add your desired formats to. This is still far less code and far easier than providing a custom implementation.

Requirements
-Windows Vista or higher*
-oleexp3.tlb with mIID.bas (although any typelib with a normal IDataObject def could be substituted)

Code
Primary code to create and drag, typically called from a MouseDown event:
Code:

Public Declare Function SHCreateDataObject Lib "shell32" (ByVal pidlFolder As Long, ByVal cidl As Long, ByVal apidl As Long, pdtInner As Any, riid As UUID, ppv As Any) As Long
Public Declare Function SHDoDragDrop Lib "shell32" (ByVal hwnd As Long, ByVal pdtobj As Long, ByVal pdsrc As Long, ByVal dwEffect As Long, pdwEffect As Long) As Long

Public Sub DoDrag()
Dim pDataObj As oleexp3.IDataObject

Call SHCreateDataObject(0&, 0&, 0&, ByVal 0&, IID_IDataObject, pDataObj)

If (pDataObj Is Nothing) Then
    Debug.Print "couldn't get ido"
Else
    Debug.Print "got ido"
    IDO_AddTextW pDataObj, "TextWTest"
    IDO_AddTextA pDataObj, "TextATest"
    Dim lp As Long
    Dim hr As Long
    hr = SHDoDragDrop(Me.hwnd, ObjPtr(pDataObj), 0&, DROPEFFECT_COPY, lp)
    Set pDataObj = Nothing
End If
End Sub

The example above adds two formats to the blank IDataObject, CF_TEXT (IDO_AddTextA) and CF_UNICODETEXT (IDO_AddTextW):
Code:

Public Declare Function GlobalAlloc Lib "kernel32" (ByVal wFlags As Long, ByVal dwBytes As Long) As Long
Public Declare Function GlobalFree Lib "kernel32" (ByVal hMem As Long) As Long
Public Declare Function GlobalLock Lib "kernel32" (ByVal hMem As Long) As Long
Public Declare Function GlobalUnlock Lib "kernel32" (ByVal hMem As Long) As Long
Public Declare Sub CopyMemory Lib "kernel32" Alias "RtlMoveMemory" (Destination As Any, Source As Any, ByVal Length As Long)

Public Sub IDO_AddTextW(ido As oleexp3.IDataObject, sText As String)
Dim fmt As FORMATETC
Dim stg As STGMEDIUM
Dim hGlobal As Long, lpGlobal As Long
Dim sz As String
sz = sText & vbNullChar
hGlobal = GlobalAlloc(GPTR, LenB(sz))
If hGlobal Then
    lpGlobal = GlobalLock(hGlobal)
    Call CopyMemory(ByVal lpGlobal, ByVal StrPtr(sz), LenB(sz))
    Call GlobalUnlock(hGlobal)
    stg.TYMED = TYMED_HGLOBAL
    stg.Data = lpGlobal
    fmt.cfFormat = CF_UNICODETEXT
    fmt.dwAspect = DVASPECT_CONTENT
    fmt.lIndex = -1
    fmt.TYMED = TYMED_HGLOBAL
    ido.SetData fmt, stg, 1
End If

End Sub
Public Sub IDO_AddTextA(ido As oleexp3.IDataObject, sText As String)
Dim fmt As FORMATETC
Dim stg As STGMEDIUM
Dim hGlobal As Long, lpGlobal As Long
Dim b() As Byte

hGlobal = GlobalAlloc(GPTR, Len(sText) + 1)
If hGlobal Then
    lpGlobal = GlobalLock(hGlobal)
    b = StrConv(sText & vbNullChar, vbFromUnicode)
    CopyMemory ByVal lpGlobal, b(0), UBound(b) + 1
    Call GlobalUnlock(hGlobal)
    stg.TYMED = TYMED_HGLOBAL
    stg.Data = lpGlobal
    fmt.cfFormat = CF_TEXT
    fmt.dwAspect = DVASPECT_CONTENT
    fmt.lIndex = -1
    fmt.TYMED = TYMED_HGLOBAL
    ido.SetData fmt, stg, 1
End If
End Sub

You can follow the same basic procedure to add any formats you want to your IDataObject. As another example, here's how to drag a PNG image from the file on disk, which shows the technique for dragging file contents:

Code:

Public Declare Function RegisterClipboardFormatW Lib "user32" (ByVal lpszFormat As Long) As Long
Public Declare Function CreateFileW Lib "kernel32" (ByVal lpFileName As Long, ByVal dwDesiredAccess As Long, ByVal dwShareMode As Long, ByVal lpSecurityAttributes As Any, ByVal dwCreationDisposition As Long, ByVal dwFlagsAndAttributes As Long, ByVal hTemplateFile As Long) As Long
Public Declare Function GetFileSize Lib "kernel32" (ByVal hFile As Long, lpFileSizeHigh As Long) As Long
Public Declare Function ReadFile Lib "kernel32" (ByVal hFile As Long, lpBuffer As Any, ByVal nNumberOfBytesToRead As Long, lpNumberOfBytesRead As Long, ByVal lpOverlapped As Any) As Long
Public Declare Function CloseHandle Lib "kernel32" (ByVal hObject As Long) As Long

Public Const FILE_READ_DATA = &H1
Public Const FILE_SHARE_READ = &H1&
Public Const OPEN_EXISTING = 3&

Public Sub IDO_AddPNG(pDataObj As oleexp3.IDataObject, sPng As String)
Dim fmt As FORMATETC
Dim stg As STGMEDIUM
Dim hGlobal As Long, lpGlobal As Long
Dim hFile As Long, nFile As Long, lp As Long
Dim bPNG() As Byte
hFile = CreateFileW(StrPtr(sPng), FILE_READ_DATA, FILE_SHARE_READ, ByVal 0&, OPEN_EXISTING, 0, 0)
If hFile Then
    nFile = GetFileSize(hFile, lp)
    Debug.Print "high=" & nFile & ",low=" & lp
    ReDim bPNG(nFile)
    ReadFile hFile, bPNG(0), nFile, lp, 0&
    CloseHandle hFile
    If lp > 0& Then

    hGlobal = GlobalAlloc(GPTR, UBound(bPNG) + 1)
    If hGlobal Then
        lpGlobal = GlobalLock(hGlobal)
        CopyMemory ByVal lpGlobal, bPNG(0), UBound(bPNG) + 1
        Call GlobalUnlock(hGlobal)
        stg.TYMED = TYMED_HGLOBAL
        stg.Data = lpGlobal
        fmt.cfFormat = RegisterClipboardFormatW(StrPtr(CFSTR_PNG))
        fmt.dwAspect = DVASPECT_CONTENT
        fmt.lIndex = -1
        fmt.TYMED = TYMED_HGLOBAL
        pDataObj.SetData fmt, stg, 1
    End If 'memalloc

    End If 'bytesread>0
End If
End Sub

You can add multiple formats to the same object; it's the drop target that decides which it can accept and display.

Since it's a custom format, we don't get the benefit of a default icon anymore. But making a drag image isn't too hard; we can use the IDragSourceHelper interface for that. If you've got a control you're dragging from that does drag images, you can use InitializeFromWindow, but if you want full control you can create the entire image yourself. Here's an IDO_AddPNGEx routine that does just that:
Code:

Public Declare Function ILCreateFromPathW Lib "shell32" (ByVal pwszPath As Long) As Long
Public Declare Function SHCreateItemFromIDList Lib "shell32" (ByVal pidl As Long, riid As UUID, ppv As Any) As Long
Public Declare Sub CoTaskMemFree Lib "ole32.dll" (ByVal PV As Long) ' Frees memory allocated by the shell

Public Sub IDO_AddPNGEx(pDataObj As oleexp3.IDataObject, sPng As String)
Dim fmt As FORMATETC
Dim stg As STGMEDIUM
Dim hGlobal As Long, lpGlobal As Long
Dim lpFmt As Long
Dim hFile As Long, nFile As Long, lp As Long
Dim bPNG() As Byte
hFile = CreateFileW(StrPtr(sPng), FILE_READ_DATA, FILE_SHARE_READ, ByVal 0&, OPEN_EXISTING, 0, 0)
If hFile Then
    nFile = GetFileSize(hFile, lp)
    Debug.Print "high=" & nFile & ",low=" & lp
    ReDim bPNG(nFile)
    ReadFile hFile, bPNG(0), nFile, lp, 0&
    CloseHandle hFile
    If lp > 0& Then
        hGlobal = GlobalAlloc(GPTR, UBound(bPNG) + 1)
        If hGlobal Then
            lpGlobal = GlobalLock(hGlobal)
            CopyMemory ByVal lpGlobal, bPNG(0), UBound(bPNG) + 1
            Call GlobalUnlock(hGlobal)
            stg.TYMED = TYMED_HGLOBAL
            stg.Data = lpGlobal
            fmt.cfFormat = CF_PNG
            fmt.dwAspect = DVASPECT_CONTENT
            fmt.lIndex = -1
            fmt.TYMED = TYMED_HGLOBAL
            pDataObj.SetData fmt, stg, 1
           
            'set thumbnail for drag
            Dim pHelper As IDragSourceHelper2
            Set pHelper = New DragDropHelper
            Dim tImg As SHDRAGIMAGE
            GetFileThumbForIDSH sPng, tImg
            pHelper.SetFlags 0&
            pHelper.InitializeFromBitmap tImg, pDataObj
        End If
    End If
End If
End Sub
Private Sub GetFileThumbForIDSH(sFile As String, tSDI As SHDRAGIMAGE, Optional cx As Long = 16, Optional cy As Long = 16)
'This method is Vista-only; you can fall back to IExtractImage or others if you're trying to support XP still
Dim pidl As Long
Dim isiif As IShellItemImageFactory
pidl = ILCreateFromPathW(StrPtr(sFile))
Call SHCreateItemFromIDList(pidl, IID_IShellItemImageFactory, isiif)
If (isiif Is Nothing) = False Then
    isiif.GetImage cx, cy, SIIGBF_THUMBNAILONLY, tSDI.hbmpDragImage
    tSDI.sizeDragImage.cx = cx
    tSDI.sizeDragImage.cy = cy
'        tSDI.ptOffset.x = 15 'you can add an offset to see it better, but the drop x,y won't change
'        tSDI.ptOffset.Y = 15
Else
    Debug.Print "GetFileThumbForIDSH::Failed to get IShellItemImageFactory"
End If
Call CoTaskMemFree(pidl)
End Sub

A 32x32 drag image thumbnail of a PNG being dragged, next to it after being dropped and rendered at full size (see next post):


And finally, you can also set a default drop description (although drop targets frequently set their own):

First, in IDO_AddPNGEx, change pHelper.SetFlags 0& to pHelper.SetFlags DSH_ALLOWDROPDESCRIPTIONTEXT
Then immediately after IDO_AddPNGEx, add IDO_AddDropDesc pDataObj, DROPIMAGE_LABEL, "Drop %1 here", "MyPNG"
Code:

Public Sub IDO_AddDropDesc(ido As oleexp3.IDataObject, nType As DROPIMAGETYPE, sMsg As String, sIns As String)
Dim fmt As FORMATETC
Dim stg As STGMEDIUM
Dim tDD As DROPDESCRIPTION
Dim iTmp1() As Integer
Dim iTmp2() As Integer
Dim hGlobal As Long, lpGlobal As Long
Dim i As Long
On Error GoTo e0

Str2WCHAR sMsg, iTmp1
Str2WCHAR sIns, iTmp2

For i = 0 To UBound(iTmp1)
    tDD.szMessage(i) = iTmp1(i)
Next i

For i = 0 To UBound(iTmp2)
    tDD.szInsert(i) = iTmp2(i)
Next i
tDD.type = nType

hGlobal = GlobalAlloc(GHND, LenB(tDD))
If hGlobal Then
    lpGlobal = GlobalLock(hGlobal)
    Call CopyMemory(ByVal lpGlobal, tDD, LenB(tDD))
    Call GlobalUnlock(hGlobal)
    stg.TYMED = TYMED_HGLOBAL
    stg.Data = lpGlobal
    fmt.cfFormat = RegisterClipboardFormatW(StrPtr(CFSTR_DROPDESCRIPTION)) 'CF_DROPDESCRIPTION
    fmt.dwAspect = DVASPECT_CONTENT
    fmt.lIndex = -1
    fmt.TYMED = TYMED_HGLOBAL
    ido.SetData fmt, stg, 1
End If
Exit Sub
e0:
    Debug.Print "IDO_AddDropDesc->" & Err.Description
End Sub
Private Sub Str2WCHAR(sz As String, iOut() As Integer)
Dim i As Long
ReDim iOut(255)
For i = 1 To Len(sz)
    iOut(i - 1) = AscW(Mid(sz, i, 1))
Next i
End Sub

--------------------------------
* - Normally I would use the undocumented SHCreateFileDataObject and retain XP support, but with this usage the IDataObject it creates returns with several additional formats inserted with blank or corrupt data. If XP support is a requirement you can try it and see if the formats are a problem for your usage or not.

How to convert StdPicture into pixel array

$
0
0
Here's some code you can put in a module, that will let you convert any StdPicture object into an ordinary byte array that contains the pixel data in 32bit-per-pixel format. In addition to it being 32bit, it makes sure that the value for field Height in the BitmapInfoHeader structure used in the conversion is a negative number, so that the first row of pixels (y=0) is always at the top (like with most image formats) rather than at the bottom (like it usually is for BMP files). The below code is fully commented, so you can see how it works.
Code:

Private Declare Function GetDIBits Lib "gdi32.dll" (ByVal hDC As Long, ByVal hBitmap As Long, ByVal nStartScan As Long, ByVal nNumScans As Long, ByRef lpBits As Any, ByRef lpBI As BITMAPINFO, ByVal wUsage As Long) As Long
Private Declare Function CreateCompatibleDC Lib "gdi32.dll" (ByVal hDC As Long) As Long
Private Declare Function DeleteDC Lib "gdi32.dll" (ByVal hDC As Long) As Long

Private Type BITMAPINFOHEADER
    biSize As Long
    biWidth As Long
    biHeight As Long
    biPlanes As Integer
    biBitCount As Integer
    biCompression As Long
    biSizeImage As Long
    biXPelsPerMeter As Long
    biYPelsPerMeter As Long
    biClrUsed As Long
    biClrImportant As Long
End Type

Private Type RGBQUAD
    rgbBlue As Byte
    rgbGreen As Byte
    rgbRed As Byte
    rgbReserved As Byte
End Type

Private Type BITMAPINFO
    bmiHeader As BITMAPINFOHEADER
    bmiColors As RGBQUAD
End Type


Public Function StdPictureToPix(ByRef Picture As StdPicture) As Byte()
    Dim Pix() As Byte
    Dim BMI As BITMAPINFO
    Dim Width As Long
    Dim Height As Long
    Dim hDC As Long
   
   
    hDC = CreateCompatibleDC(0) 'Create a temporary in-memory device context
    BMI.bmiHeader.biSize = Len(BMI.bmiHeader) 'Initialize BitmapInfoHeader with header size
    GetDIBits hDC, Picture.Handle, 0, 0, ByVal 0&, BMI, 0 'Get Information about the image
   
    'Set up BitmapInfoHeader for getting the pixel data in 32bit format, and with y=0 on the top
    With BMI.bmiHeader
        .biBitCount = 32
        .biClrUsed = 0
        .biClrImportant = 0
        .biSizeImage = 0
        .biCompression = 0
        Width = .biWidth
        Height = Abs(.biHeight)
        .biHeight = -Height
    End With
    '32bit format has, for each pixel, 3 color channels in the order B, G, R, and an unused channel
    'This always satisfies the condition that each image row must have a multiple-of-4 byte count
   
    ReDim Pix(3, Width - 1, Height - 1) 'Initialize array for holding pixel data
    GetDIBits hDC, Picture.Handle, 0, Height, Pix(0, 0, 0), BMI, 0 'Get pixel data
    DeleteDC hDC 'Get rid of temporary in-memory device context
   
    StdPictureToPix = Pix()
End Function

After calling this to get the pixels in an array, to get the width you just need to do UBound(arrayname,2)+1 to get the width in the calling function, and UBound(arrayname,3)+1 to get the height. UBound(arrayname,1)+1 always is 4, because there are 4 bytes per pixel, and the first dimension in the array is the color channel selector (0=B, 1=G, 2=R, 3=unused). Here's some sample code for sample code for how to use it to load a picture file directly into a byte array, and then displaying it to the form (albeit using the inefficient PSet statement).
Code:

Private Sub Form_Load()
    Dim x As Long
    Dim y As Long
    Dim Pix() As Byte
    Dim Img As New ImageFile
   
    Pix() = StdPictureToPix(LoadPicture("picturefile.jpg"))
    Show
    For y = 0 To UBound(Pix, 3)
        For x = 0 To UBound(Pix, 2)
            PSet (x, y), RGB(Pix(2, x, y), Pix(1, x, y), Pix(0, x, y))
        Next x
        DoEvents
    Next y
End Sub

Note that LoadPicture only works with BMP, JPG, and GIF formats. If you want to support TIF and PNG, you will need to use WIA 2.0, which comes with all versions of Windows since Vista, but not XP (though it might be available in Windows XP with SP3).

General purpose SxS manifest file

$
0
0
Hello All,

I've assembled a .manifest file that allows for Side-by-Side, registration-free execution of compiled VB6 programs using any (or all) of the following OCX files:
  • tabctl32.ocx
  • comdlg32.ocx
  • richtx32.ocx
  • mscomctl.ocx
  • mscomct2.ocx

The name of this manifest file (attached) is "AllPurposeManifest.txt". To use it, download it, and then rename it to the name of your compiled VB6 program, with the EXE and appending a .manifest after that. For instance, if your compiled program was named "MyProg.exe", then the manifest file would be named "MyProg.exe.manifest".

Now, to use it, this manifest file MUST be in the same folder with your EXE file. In addition, all of the above OCX files must also be in the same folder with your EXE file. These OCX files are somewhat version dependent. Also, since they're all redistributable, I've zipped them up and put them in a place you can down load them. To download them click HERE.

This manifest file is an ANSI Notepad readable file, so feel free to take a look at it.

Also, I've attached the source code to an example project named AllPurpose (attached as AllPurposeDemo.zip). To see this demo in action, download it, compile it, rename the manifest file to AllPurpose.exe.manifest, place this manifest file in the folder with the exe, place all the OCX files in this folder as well, and then execute it. (I didn't include the RichTextbox in this demo because that creates a binary frx file, and these binary files are not allowed in attachments in these forums. However, it is referenced and you can include it yourself on the demo form if you like.)

What are the advantages of doing this? First, it allows you a way to distribute your program without the need for any installation. In other words, you could just zip everything up (possibly excluding your source code files), and then unzip it on any modern Windows machine in a folder of your choice, and it'll just RUN! Secondly, keeping track of what OCX files you're using keeps you out of DLL hell. If you "install" your OCX files, there's nothing to prevent some other installer from "upgrading" them, potentially breaking your program. Just as an FYI, other than your own data files, all that would need to be in your distributable ZIP file is your EXE program, the manifest file (correctly named), and the OCX files. The VB6 runtime files are already pre-installed on all late versions of Windows.

There are also a couple of other things worth noting. First, this isn't necessarily the only way to assemble a registration-free (no installation needed) VB6 program. Krool (a participant in these forums) has done incredible work to develop VB6 custom controls (API created) for most of the controls people use from OCX files. If his work meets your needs, you could throw it all into your project, not having any references to OCX files, and you'd have a registration-free program.

There are also things other than side-by-side (runtime) registration of OCX files that can be placed in these manifest files. I'm not going to go into any of that here, but I will say that Dilettante (another participant in these forums) is quite knowledgeable about this information, and I will refer you to him if you'd like to know more (that is, if he's willing).

Lastly, if there's a "mainstream" OCX that you're using that's not in the above list, post the name of it in this thread, and I'll see about including it in the attached manifest file.

As a final note, none of this has anything to do with the VB6 IDE. This will only affect compiled programs.

Enjoy,
Elroy
Attached Files

Matrix (Linear) Algebra Program

$
0
0
I was going through some of my stuff and thought maybe others could make use of some of it (and I've got tons).

Here's a little matrix (linear) algebra program. It does all the simple stuff as well as some more-or-less higher-level statistics stuff. It'll "solve" a matrix using the Jacobi method, and it also has Varimax, Quartimax, and Equimax rotations in it. I've got some non-orthogonal rotation code somewhere, but I'll have to find it.

Also, this code has a reference in it to "Microsoft Excel 14.0 Object Library" (Excel 2010) because I use Excel as a grid for the matrices. If someone asks, I could probably change this to late-binding so that this reference wouldn't be required (although some version of Excel on the machine would still be required).

Maybe someone can make some use of this stuff.

Also, just as an FYI, something I've always wanted to do in VB6 was to write a more general purpose matrix solution routine (as opposed to the Jacobi routine herein). These days, these routines are typically called SVD (or, Singular Value Decomposition) routines. One of the advantages they have over he Jacobi method is that they'll solve matrices that contain singularities. If someone knows of such a VB6 routine, I'd love to hear about it.

EDIT: Actually, I found a SVD for VB6. I already had it. It was in the Alglib routines. For those of you not familiar with those routines, they're quite impressive. They were all written by Sergey Bochkanov, a Russian mathematician. And even better yet, he wrote a VB6 version. If you're at all interested, they can be downloaded here:
http://www.alglib.net/translator/re/...-2.6.0.vb6.zip
and his main webpage is here: http://www.alglib.net

Now I've got something to do. :p I can see if Sergey's SVD routine works the way it's suppose to.

Again, Enjoy,
Elroy
Attached Files

ComboBox with Multi-select (I call it ComboCheck)

$
0
0
I was on Krool's Common Controls thread and he got me thinking about custom controls. I've got quite a few (some already posted), but I've got a few that may be of use to others.

This one I call my ComboCheck box. Basically, it's a ComboBox for which multiple items can be selected out of it (rather than just one like the standard ComboBox). For my purposes, it comes in quite handy, so I thought I'd share. It's included in the attached demo project. If you wish to use it, just put the ComboCheck.ctl file in your project, and it'll appear in your toolbox. Just as an FYI, it does require the "OLE Automation" reference, but that's typically referenced in VB6 projects by default (unless you explicitly un-reference it).

Enjoy,
Elroy
Attached Files

Module for direclty using FFTW in VB6

$
0
0
As you probably remember, I created a DLL file, using ASM code (which you can find here http://www.vbforums.com/showthread.p...libfftw3-3-dll), that had STDCALL functions, that called the CDECL functions in the FFTW DLL file. However, that requires distributing one more dependency with programs that use FFTW. I found a way, using Windows API calls in a standard VB6 module, to directly call all the CDECL functions from within VB6. The file is called FFTW3.bas (as it is designed to work with version 3 of FFTW, which is the latest version). Below is a link to the code for that module on PasteBin (sorry, it's too many characters to paste on VBForums, as it goes over the 15000 character limit).

http://pastebin.com/cnJw8mB1

The first thing you want to do when your program starts is call InitFFTW.
The way that InitFFTW works is, it first uses LoadLibrary to load libfftw3-3.dll into memory, and get a handle to it. It then uses a series of calls to the GetProcAddress function, to get the addresses of all the functions that are most important in FFTW (there's a few that the DLL file has that are much more advanced, but 99% of the time you won't be needing them, so they aren't included in this module).

When your program closes, the last action your program takes should be to call CloseFFTW. This empties the collection that has stored the addresses for all the functions, and then frees the DLL for FFTW itself by calling FreeLibrary.


Now after you have called InitFFTW, you can use any of the other public functions in this module. The first one you are going to need to use is one of the Plan functions. This generates what the makers of FFTW call a "plan", which is an opaque structure that has all the stuff setup in memory needed to perform a particular type of timedomain2frequencydomain transform (or frequencydomain2timedomain transform). The value returned from such a Plan function is a handle to the plan. After the plan is set up, you can use it with either the initial data source and destination that was set up at the time of making the plan (via the FFTWExecute method), or use it on data sources or destinations other than those that were used at the time the plan was created (via one of the following methods, FFTWExecuteDFT, FFTWExecuteDFTR2C, FFTWExecuteDFTC2R, or FFTWExecuteR2R).

After you are done with executing the transform, if you don't need to use it again, you can call FFTWDestroyPlan. This will allow you to free the memory occupied by that plan. However, it doesn't get rid everything that was created when the plan was created. When the plan was created, something else called "wisdom" was also create. This is additional data that is created when the plan was created, which can optimize the internal workings of FFTW, so that future calls to plan creation functions can be speed up. The more plans you create, the more "wisdom" gets created, so use it, the faster it is able to operate when creating additional plans, because the more it is able to optimize its internal workings. It's a sort of "machine learning" algorithm that they seem to have implemented. However, if you want to clear out all the memory that got allocated by the use of FFTW (including all plans, and all created wisdom), without actually freeing the entire DLL file from memory, then you can use FFTWCleanup.

Note that, except for InitFFTW and CloseFFTW, all of the public methods in this module actually don't directly make a call to libfftw3-3.dll. Instead they make a call to a private function in my module called CallCDECL, which in turn uses the Windows API function called DispCallFunc to actually call the CDECL functions in the FFTW DLL file.

Module for directly using FFTW in VB6

$
0
0
As you probably remember, I created a DLL file, using ASM code (which you can find here http://www.vbforums.com/showthread.p...libfftw3-3-dll), that had STDCALL functions, that called the CDECL functions in the FFTW DLL file. However, that requires distributing one more dependency with programs that use FFTW. I found a way, using Windows API calls in a standard VB6 module, to directly call all the CDECL functions from within VB6. The file is called FFTW3.bas (as it is designed to work with version 3 of FFTW, which is the latest version). Below is a link to the code for that module on PasteBin (sorry, it's too many characters to paste on VBForums, as it goes over the 15000 character limit).

http://pastebin.com/cnJw8mB1

The first thing you want to do when your program starts is call InitFFTW.
The way that InitFFTW works is, it first uses LoadLibrary to load libfftw3-3.dll into memory, and get a handle to it. It then uses a series of calls to the GetProcAddress function, to get the addresses of all the functions that are most important in FFTW (there's a few that the DLL file has that are much more advanced, but 99% of the time you won't be needing them, so they aren't included in this module).

When your program closes, the last action your program takes should be to call CloseFFTW. This empties the collection that has stored the addresses for all the functions, and then frees the DLL for FFTW itself by calling FreeLibrary.


Now after you have called InitFFTW, you can use any of the other public functions in this module. The first one you are going to need to use is one of the Plan functions. This generates what the makers of FFTW call a "plan", which is an opaque structure that has all the stuff setup in memory needed to perform a particular type of timedomain2frequencydomain transform (or frequencydomain2timedomain transform). The value returned from such a Plan function is a handle to the plan. After the plan is set up, you can use it with either the initial data source and destination that was set up at the time of making the plan (via the FFTWExecute method), or use it on data sources or destinations other than those that were used at the time the plan was created (via one of the following methods, FFTWExecuteDFT, FFTWExecuteDFTR2C, FFTWExecuteDFTC2R, or FFTWExecuteR2R).

After you are done with executing the transform, if you don't need to use it again, you can call FFTWDestroyPlan. This will allow you to free the memory occupied by that plan. However, it doesn't get rid everything that was created when the plan was created. When the plan was created, something else called "wisdom" was also create. This is additional data that is created when the plan was created, which can optimize the internal workings of FFTW, so that future calls to plan creation functions can be speed up. The more plans you create, the more "wisdom" gets created, so use it, the faster it is able to operate when creating additional plans, because the more it is able to optimize its internal workings. It's a sort of "machine learning" algorithm that they seem to have implemented. However, if you want to clear out all the memory that got allocated by the use of FFTW (including all plans, and all created wisdom), without actually freeing the entire DLL file from memory, then you can use FFTWCleanup.

Note that, except for InitFFTW and CloseFFTW, all of the public methods in this module actually don't directly make a call to libfftw3-3.dll. Instead they make a call to a private function in my module called CallCDECL, which in turn uses the Windows API function called DispCallFunc to actually call the CDECL functions in the FFTW DLL file.

[VB6] Drag drop any format to other apps without custom IDataObject

$
0
0

3 Aug 2016 UPDATE: This is fairly complex stuff so I've added a sample project. The sample project also has functions for added a few more formats, and receives text too. An updated cDropTarget class was made more portable and easy to use; it's not the super-involved one I'm working on, it just pushes events out with the IDataObject for the project to handle elsewhere. Also, dropping PNGs in the same process they were created in caused a heap corruption crash, this has been fixed by making the dataobject module-level so it doesn't prematurely go out of scope and get freed.

While I've got a thread going about how to do this the right way and actually implement an IDataObject, in the mean time I thought I'd post a trick that you can use to dragdrop any format without one.

Normally, to drag text to another app, you'd have to create an implementation of IDataObject in a class, then implement all its methods and support CF_TEXT and/or CF_UNICODETEXT and others you wanted. However, if you were just looking to copy files with CF_HDROP, you may have seen my other project where there's an API that does this for you-- SHCreateDataObject. There's not a direct equivalent for any other CF_ format, but it turns out that you can call that API without actually specifying a file, and still get back a fully functional default IDataObject from Windows instead of rolling your own custom one, which you can then add your desired formats to. This is still far less code and far easier than providing a custom implementation.

Requirements
-Windows Vista or higher*
-oleexp3.tlb with mIID.bas

Code
Primary code to create and drag, typically called from a MouseDown event:
Code:

Public Declare Function SHCreateDataObject Lib "shell32" (ByVal pidlFolder As Long, ByVal cidl As Long, ByVal apidl As Long, pdtInner As Any, riid As UUID, ppv As Any) As Long
Public Declare Function SHDoDragDrop Lib "shell32" (ByVal hwnd As Long, ByVal pdtobj As Long, ByVal pdsrc As Long, ByVal dwEffect As Long, pdwEffect As Long) As Long

Public Sub DoDrag()
Dim pDataObj As oleexp3.IDataObject

Call SHCreateDataObject(0&, 0&, 0&, ByVal 0&, IID_IDataObject, pDataObj)

If (pDataObj Is Nothing) Then
    Debug.Print "couldn't get ido"
Else
    Debug.Print "got ido"
    IDO_AddTextW pDataObj, "TextWTest"
    IDO_AddTextA pDataObj, "TextATest"
    Dim lp As Long
    Dim hr As Long
    hr = SHDoDragDrop(Me.hwnd, ObjPtr(pDataObj), 0&, DROPEFFECT_COPY, lp)
    Set pDataObj = Nothing
End If
End Sub

The example above adds two formats to the blank IDataObject, CF_TEXT (IDO_AddTextA) and CF_UNICODETEXT (IDO_AddTextW):
Code:

Public Declare Function GlobalAlloc Lib "kernel32" (ByVal wFlags As Long, ByVal dwBytes As Long) As Long
Public Declare Function GlobalFree Lib "kernel32" (ByVal hMem As Long) As Long
Public Declare Function GlobalLock Lib "kernel32" (ByVal hMem As Long) As Long
Public Declare Function GlobalUnlock Lib "kernel32" (ByVal hMem As Long) As Long
Public Declare Sub CopyMemory Lib "kernel32" Alias "RtlMoveMemory" (Destination As Any, Source As Any, ByVal Length As Long)

Public Sub IDO_AddTextW(ido As oleexp3.IDataObject, sText As String)
Dim fmt As FORMATETC
Dim stg As STGMEDIUM
Dim hGlobal As Long, lpGlobal As Long
Dim sz As String
sz = sText & vbNullChar
hGlobal = GlobalAlloc(GPTR, LenB(sz))
If hGlobal Then
    lpGlobal = GlobalLock(hGlobal)
    Call CopyMemory(ByVal lpGlobal, ByVal StrPtr(sz), LenB(sz))
    Call GlobalUnlock(hGlobal)
    stg.TYMED = TYMED_HGLOBAL
    stg.Data = lpGlobal
    fmt.cfFormat = CF_UNICODETEXT
    fmt.dwAspect = DVASPECT_CONTENT
    fmt.lIndex = -1
    fmt.TYMED = TYMED_HGLOBAL
    ido.SetData fmt, stg, 1
End If

End Sub
Public Sub IDO_AddTextA(ido As oleexp3.IDataObject, sText As String)
Dim fmt As FORMATETC
Dim stg As STGMEDIUM
Dim hGlobal As Long, lpGlobal As Long
Dim b() As Byte

hGlobal = GlobalAlloc(GPTR, Len(sText) + 1)
If hGlobal Then
    lpGlobal = GlobalLock(hGlobal)
    b = StrConv(sText & vbNullChar, vbFromUnicode)
    CopyMemory ByVal lpGlobal, b(0), UBound(b) + 1
    Call GlobalUnlock(hGlobal)
    stg.TYMED = TYMED_HGLOBAL
    stg.Data = lpGlobal
    fmt.cfFormat = CF_TEXT
    fmt.dwAspect = DVASPECT_CONTENT
    fmt.lIndex = -1
    fmt.TYMED = TYMED_HGLOBAL
    ido.SetData fmt, stg, 1
End If
End Sub

You can follow the same basic procedure to add any formats you want to your IDataObject. As another example, here's how to drag a PNG image from the file on disk, which shows the technique for dragging file contents:

Code:

Public Declare Function RegisterClipboardFormatW Lib "user32" (ByVal lpszFormat As Long) As Long
Public Declare Function CreateFileW Lib "kernel32" (ByVal lpFileName As Long, ByVal dwDesiredAccess As Long, ByVal dwShareMode As Long, ByVal lpSecurityAttributes As Any, ByVal dwCreationDisposition As Long, ByVal dwFlagsAndAttributes As Long, ByVal hTemplateFile As Long) As Long
Public Declare Function GetFileSize Lib "kernel32" (ByVal hFile As Long, lpFileSizeHigh As Long) As Long
Public Declare Function ReadFile Lib "kernel32" (ByVal hFile As Long, lpBuffer As Any, ByVal nNumberOfBytesToRead As Long, lpNumberOfBytesRead As Long, ByVal lpOverlapped As Any) As Long
Public Declare Function CloseHandle Lib "kernel32" (ByVal hObject As Long) As Long

Public Const FILE_READ_DATA = &H1
Public Const FILE_SHARE_READ = &H1&
Public Const OPEN_EXISTING = 3&

Public Sub IDO_AddPNG(pDataObj As oleexp3.IDataObject, sPng As String)
Dim fmt As FORMATETC
Dim stg As STGMEDIUM
Dim hGlobal As Long, lpGlobal As Long
Dim hFile As Long, nFile As Long, lp As Long
Dim bPNG() As Byte
hFile = CreateFileW(StrPtr(sPng), FILE_READ_DATA, FILE_SHARE_READ, ByVal 0&, OPEN_EXISTING, 0, 0)
If hFile Then
    nFile = GetFileSize(hFile, lp)
    Debug.Print "high=" & nFile & ",low=" & lp
    ReDim bPNG(nFile)
    ReadFile hFile, bPNG(0), nFile, lp, 0&
    CloseHandle hFile
    If lp > 0& Then

    hGlobal = GlobalAlloc(GPTR, UBound(bPNG) + 1)
    If hGlobal Then
        lpGlobal = GlobalLock(hGlobal)
        CopyMemory ByVal lpGlobal, bPNG(0), UBound(bPNG) + 1
        Call GlobalUnlock(hGlobal)
        stg.TYMED = TYMED_HGLOBAL
        stg.Data = lpGlobal
        fmt.cfFormat = RegisterClipboardFormatW(StrPtr(CFSTR_PNG))
        fmt.dwAspect = DVASPECT_CONTENT
        fmt.lIndex = -1
        fmt.TYMED = TYMED_HGLOBAL
        pDataObj.SetData fmt, stg, 1
    End If 'memalloc

    End If 'bytesread>0
End If
End Sub

You can add multiple formats to the same object; it's the drop target that decides which it can accept and display.

Since it's a custom format, we don't get the benefit of a default icon anymore. But making a drag image isn't too hard; we can use the IDragSourceHelper interface for that. If you've got a control you're dragging from that does drag images, you can use InitializeFromWindow, but if you want full control you can create the entire image yourself. Here's an IDO_AddPNGEx routine that does just that:
Code:

Public Declare Function ILCreateFromPathW Lib "shell32" (ByVal pwszPath As Long) As Long
Public Declare Function SHCreateItemFromIDList Lib "shell32" (ByVal pidl As Long, riid As UUID, ppv As Any) As Long
Public Declare Sub CoTaskMemFree Lib "ole32.dll" (ByVal PV As Long) ' Frees memory allocated by the shell

Public Sub IDO_AddPNGEx(pDataObj As oleexp3.IDataObject, sPng As String)
Dim fmt As FORMATETC
Dim stg As STGMEDIUM
Dim hGlobal As Long, lpGlobal As Long
Dim lpFmt As Long
Dim hFile As Long, nFile As Long, lp As Long
Dim bPNG() As Byte
hFile = CreateFileW(StrPtr(sPng), FILE_READ_DATA, FILE_SHARE_READ, ByVal 0&, OPEN_EXISTING, 0, 0)
If hFile Then
    nFile = GetFileSize(hFile, lp)
    Debug.Print "high=" & nFile & ",low=" & lp
    ReDim bPNG(nFile)
    ReadFile hFile, bPNG(0), nFile, lp, 0&
    CloseHandle hFile
    If lp > 0& Then
        hGlobal = GlobalAlloc(GPTR, UBound(bPNG) + 1)
        If hGlobal Then
            lpGlobal = GlobalLock(hGlobal)
            CopyMemory ByVal lpGlobal, bPNG(0), UBound(bPNG) + 1
            Call GlobalUnlock(hGlobal)
            stg.TYMED = TYMED_HGLOBAL
            stg.Data = lpGlobal
            fmt.cfFormat = CF_PNG
            fmt.dwAspect = DVASPECT_CONTENT
            fmt.lIndex = -1
            fmt.TYMED = TYMED_HGLOBAL
            pDataObj.SetData fmt, stg, 1
           
            'set thumbnail for drag
            Dim pHelper As IDragSourceHelper2
            Set pHelper = New DragDropHelper
            Dim tImg As SHDRAGIMAGE
            GetFileThumbForIDSH sPng, tImg
            pHelper.SetFlags 0&
            pHelper.InitializeFromBitmap tImg, pDataObj
        End If
    End If
End If
End Sub
Private Sub GetFileThumbForIDSH(sFile As String, tSDI As SHDRAGIMAGE, Optional cx As Long = 16, Optional cy As Long = 16)
'This method is Vista-only; you can fall back to IExtractImage or others if you're trying to support XP still
Dim pidl As Long
Dim isiif As IShellItemImageFactory
pidl = ILCreateFromPathW(StrPtr(sFile))
Call SHCreateItemFromIDList(pidl, IID_IShellItemImageFactory, isiif)
If (isiif Is Nothing) = False Then
    isiif.GetImage cx, cy, SIIGBF_THUMBNAILONLY, tSDI.hbmpDragImage
    tSDI.sizeDragImage.cx = cx
    tSDI.sizeDragImage.cy = cy
'        tSDI.ptOffset.x = 15 'you can add an offset to see it better, but the drop x,y won't change
'        tSDI.ptOffset.Y = 15
Else
    Debug.Print "GetFileThumbForIDSH::Failed to get IShellItemImageFactory"
End If
Call CoTaskMemFree(pidl)
End Sub

A 32x32 drag image thumbnail of a PNG being dragged, next to it after being dropped and rendered at full size (see next post):


And finally, you can also set a default drop description (although drop targets frequently set their own):

First, in IDO_AddPNGEx, change pHelper.SetFlags 0& to pHelper.SetFlags DSH_ALLOWDROPDESCRIPTIONTEXT
Then immediately after IDO_AddPNGEx, add IDO_AddDropDesc pDataObj, DROPIMAGE_LABEL, "Drop %1 here", "MyPNG"
Code:

Public Sub IDO_AddDropDesc(ido As oleexp3.IDataObject, nType As DROPIMAGETYPE, sMsg As String, sIns As String)
Dim fmt As FORMATETC
Dim stg As STGMEDIUM
Dim tDD As DROPDESCRIPTION
Dim iTmp1() As Integer
Dim iTmp2() As Integer
Dim hGlobal As Long, lpGlobal As Long
Dim i As Long
On Error GoTo e0

Str2WCHAR sMsg, iTmp1
Str2WCHAR sIns, iTmp2

For i = 0 To UBound(iTmp1)
    tDD.szMessage(i) = iTmp1(i)
Next i

For i = 0 To UBound(iTmp2)
    tDD.szInsert(i) = iTmp2(i)
Next i
tDD.type = nType

hGlobal = GlobalAlloc(GHND, LenB(tDD))
If hGlobal Then
    lpGlobal = GlobalLock(hGlobal)
    Call CopyMemory(ByVal lpGlobal, tDD, LenB(tDD))
    Call GlobalUnlock(hGlobal)
    stg.TYMED = TYMED_HGLOBAL
    stg.Data = lpGlobal
    fmt.cfFormat = RegisterClipboardFormatW(StrPtr(CFSTR_DROPDESCRIPTION)) 'CF_DROPDESCRIPTION
    fmt.dwAspect = DVASPECT_CONTENT
    fmt.lIndex = -1
    fmt.TYMED = TYMED_HGLOBAL
    ido.SetData fmt, stg, 1
End If
Exit Sub
e0:
    Debug.Print "IDO_AddDropDesc->" & Err.Description
End Sub
Private Sub Str2WCHAR(sz As String, iOut() As Integer)
Dim i As Long
ReDim iOut(255)
For i = 1 To Len(sz)
    iOut(i - 1) = AscW(Mid(sz, i, 1))
Next i
End Sub

--------------------------------
* - Normally I would use the undocumented SHCreateFileDataObject and retain XP support, but with this usage the IDataObject it creates returns with several additional formats inserted with blank or corrupt data. If XP support is a requirement you can try it and see if the form
Attached Files

Here's my own frequency domain transform.

$
0
0
I believe that this transform may be completely new, an invention of my own. It is a variant of the DCT, that I've never seen documented before. It solves a problem that normal DCTs have. It allows you to actually work up to the highest frequency possible. With a normal DCT (lets use an 8-point DCT for this example), when you perform the forward DCT, you have the highest frequency bin representing 7.5 half-cycles per 8-point data set. Yet in an 8 point data set, the highest possible frequency is in fact 8 half-cycles. So while this transform is capable of capturing enough data to be completely reversible and get back your original time-domain data if your starting data is time-domain data, if you are starting in the frequency-domain, and plan to use an IDCT to construct a time-domain signal, you will run into a problem. That problem is that if you set the highest bin to some value in your frequency-domain, and then perform an IDCT, you won't get a nice continuous-amplitude waveform at the highest frequency. Instead you will get a waveform that starts at zero amplitude, and then swells to maximum amplitude in the middle of the data set, and then decreases to zero at the other end. It will be a signal that has the highest frequency, but it's certainly does not have constant amplitude.

Now that is not fixed in any of the other DCTs, (there's 3 variants, DCT1 which is its own inverse, DCT4 which is its own inverse,and DCT2 which has DCT3 as its inverse). To get around this problem, you can use a DFT where the the bin at datasetsize/2 represents the highest frequency, but for real-valued input the second half of data set is redundant. In the the real-number bins, the second side is a mirror image of the first side. In the imaginary-number bins, the second side is a negative mirror image of the first side.

This is why I designed the DCT_B (which stands for Discrete Cosine Transform, Ben's version), and its inverse, the IDCT_B. The frequency-domain dataset size is only one bin more than the time-domain dataset size (for any TDSize, FDSize=TDSize+1). So an 8-point time-domain dataset has a 9-point frequency-domain dataset. And the practical effect of this is that when you set the highest frequency bin in the frequency-domain, and then perform an IDCT_B on it, you will get a constant-amplitude signal at the highest frequency.

Also, whereas other DCTs don't usually include a scaling factor in their definition, and instead choose to describe it as an additional step to normalize the values, the definition of my own DCT, the DCT_B, has a built-in scaling factor. This scaling factor guarenties that if you have a cosine wave, the amplitude of that wave can be read-out directly in the DCT. For example, if I have an 8-point data set containing cos(Pi/8*F*n)*A , where n is a value incremented from 0 to 7 in a for-next loop, and A is the amplitude, and F is an integer between 0 and 8; and then I perform a DCT_B on that data set (which will give me frequency-domain data with bins from 0 to 8), you will find that bin# F contains the value A.

Here is my VB6 code that defines the DCT_B and its inverse, the IDCT_B.
Code:

Private Const Pi As Double = 3.14159265358979

Public Sub DCT_B(ByRef Src() As Double, ByRef Dest() As Double)
    Dim n As Long
    Dim k As Long
    Dim TDLen As Long
    Dim FDLen As Long
   
    TDLen = UBound(Src) + 1
    FDLen = TDLen + 1
    ReDim Dest(FDLen - 1)
   
    For k = 0 To FDLen - 1
        For n = 0 To TDLen - 1
            Dest(k) = Dest(k) + Src(n) * Cos(Pi / TDLen * n * k) / TDLen * 2
        Next n
    Next k
    Dest(0) = Dest(0) / 2
    Dest(FDLen - 1) = Dest(FDLen - 1) / 2
End Sub


Public Sub IDCT_B(ByRef Src() As Double, ByRef Dest() As Double)
    Dim n As Long
    Dim k As Long
    Dim TDLen As Long
    Dim FDLen As Long
   
    FDLen = UBound(Src) + 1
    TDLen = FDLen - 1
    ReDim Dest(TDLen - 1)
   
   
    For n = 0 To TDLen - 1
        For k = 0 To FDLen - 1
            Dest(n) = Dest(n) + Src(k) * Cos(Pi / TDLen * n * k)
        Next k
    Next n
    Dest(0) = Dest(0) / 2
End Sub

While this works for all data sets, such that performing the DCT_B and then the IDCT_B on the output of the DCTB gives you back an exact copy of your original data (even if that data is a sinewave instead of a cosine wave), the ability to read the amplitude of a wave by looking at the value in the bin corresponding to its frequency works only for cosine waves. To be able to read off the amplitude of a sinewave, I have devised an equivalent DST, that I call the DST_B (Discrete Sine Transform, Ben's version) and its inverses, the IDST_B. Below is the code for the DST_B and IDST_B.

Code:

Public Sub DST_B(ByRef Src() As Double, ByRef Dest() As Double)
    Dim n As Long
    Dim k As Long
    Dim TDLen As Long
    Dim FDLen As Long
   
    TDLen = UBound(Src) + 1
    FDLen = TDLen + 1
    ReDim Dest(FDLen - 1)
   
    For k = 0 To FDLen - 1
        For n = 0 To TDLen - 1
            Dest(k) = Dest(k) + Src(n) * Sin(Pi / TDLen * n * k) / TDLen * 2
        Next n
    Next k
End Sub


Public Sub IDST_B(ByRef Src() As Double, ByRef Dest() As Double)
    Dim n As Long
    Dim k As Long
    Dim TDLen As Long
    Dim FDLen As Long
   
    FDLen = UBound(Src) + 1
    TDLen = FDLen - 1
    ReDim Dest(TDLen - 1)
   
   
    For n = 0 To TDLen - 1
        For k = 0 To FDLen - 1
            Dest(n) = Dest(n) + Src(k) * Sin(Pi / TDLen * n * k)
        Next k
    Next n
End Sub

The downside to using a DST_B is that the bin for DC is always 0, and so is the bin for the highest frequency. Interestingly, while the DST_B can produce frequency-domain data that allows reconstruction of a DC (despite the missing DC coefficient) or highest-frequency (despite the missing highest-frequency coefficient) signal via an IDST_B, the reconstructed time-domain signal always has its first sample set to 0.


But what about measuing the amplitude of a sinusoidal wave form with an arbitrary phase shift (neither Sine nor Cosine)? For that, you simply take the bin corresponding to the frequency in question and take the DST_B copy of it and square it, and do the same thing for the DCT_B copy of it. Then you add these 2 squared values together and take the square root. This will give you the amplitude of any sinusoidal waveform with an arbitrary phase-shift. To make this process easier, I have created a Sub called DFT_B (which stands for Discrete Fourier Transform, Ben's version), which performs both the DCT_B and DST_B. I also created its inverse called the IDFT_B, which performs the IDCT_B and IDST_B and then averages those 2 results. Because both the DCT_B and DST_B both produce frequency-domain data that can reconstruct the entire signal (except for a DC signal when the transform is the DST_B), performing an IDFT_B isn't necessary, and I've just written it for the sake of completeness. Losing either the DCT_B or DST_B frequency-domain dataset only cuts the amplitude of the time-domain dataset by half when performing the IDFT_B, rather than changing the entire shape of the waveform.

Here is my code for the DFT_B and IDFT_B.
Code:

Public Sub DFT_B(ByRef Src() As Double, ByRef DestDCT() As Double, ByRef DestDST() As Double)
    DCT_B Src(), DestDCT()
    DST_B Src(), DestDST()
End Sub


Public Sub IDFT_B(ByRef SrcDCT() As Double, ByRef SrcDST() As Double, ByRef Dest() As Double)
    Dim n As Long
    Dim DestPart2() As Double
    IDCT_B SrcDCT(), Dest()
    IDST_B SrcDST(), DestPart2()
    For n = 0 To UBound(Dest)
        Dest(n) = (Dest(n) + DestPart2(n)) / 2
    Next n
    Dest(0) = Dest(0) * 2
End Sub

Completely Portable and Clean VB6 Projects

$
0
0
The objective here is to create a completely portable, dependency free, no registration needed, no installation needed, VB6 executable. Also, there's the added task that it should "clean up after itself".

Also, there's the criteria that we may use various ActiveX (OCX) controls. For purposes of this example, I've assumed that we're using the mscomctl.ocx (and only that one), but the concept can be easily extended to other ActiveX controls (and even DLL libraries).

This idea is perfect for a small application with no datafiles, possibly like a calculator. From the VB6 IDE, it actually takes two projects. I'll call them Project1 and Project2. Project1 is actually a "loader", "execute", and "clean-up" program. Project2 is the actual program that the user will see.

Alright, here are the steps to do it. Let's start with Project2 (your actual program):
  • Start a new project.
  • Rename the project name to Project2 under Project Properties.
  • Rename the default form to Form2. (There's no Form1 in this project.)
  • Add a component reference to mscomctl.ocx (Microsoft Windows COmmon Controls 6.0 (SP6)).
  • Throw several controls from mscomctl.ocx onto the default form (see picture below).
  • Save the project, saving it as Project2 and Form2.
  • Compile the project as Project2.exe.


It really doesn't matter what code you put into this project. It's just a demonstration. But we will need this Project2.exe to continue.

Here's a picture of my Form2 (with some mscomctl.ocx controls on it):

Name:  Form2.gif
Views: 68
Size:  9.4 KB

Now for the Project1 (loader) project. Here are the steps for it:
  • Start a new project.
  • (No need for any additional references. In fact, it's important to not have any.)
  • Place the Form1 code (see below) into Form1.
  • I also placed a label on this form, just so I'd know what it was (see picture below).
  • Using the resource editor, add mscomctl.ocx, Project2.exe, and Project2.exe.manifest files.
    • To actually use the resource editor, you must load it within the VB6 IDE. It is found on the menu under Add-Ins / Add-In Manager....
    • I use the mscomctl.ocx version 6.01.9545. The manifest is set up for this version. If you use a different version, you can download this version here. So long as you don't register it on your computer (and nothing I suggest does this), it won't interfere with any other programs. Just save it in the same folder with your source code for this project.
    • You'll also need the XML code that goes into the Project2.exe.manifest file for this demo. Note that this file is always named the same as your executable, with the addition of the .manifest extension. This is an ASCII/ANSI file that can be created with Notepad (or any other ASCII/ANSI editor). It was a bit long to place in a code section of this post, so here's a link to download this file as well.
    • Also, I chose to make a resource category named "Dependencies". Once your done adding the three files to Project1's resources, you should see these three files (see picture below of resource manager window).
    • When done, save the resources and close the resource editor.
  • Save the project as Project1 and Form1.
  • Compile this Project1 as Project1.exe. It's important to not place this Project1.exe in with your source code, because it will attempt to delete any Project2.exe, Project2.exe.manifest, and mscomctl.ocx file in it's folder when it terminates.
  • Once it's compiled, execute it, and watch what happens in the folder its in. The three files in the resources will be unpacked, and Project2 will be executed. When Project2 terminates, Project1 will clean up everything in the folder. And this works regardless of whether mscomctl.ocx was previously registered on the machine or not. In fact, nothing here will even interfere or use this other copy of mscomctl.ocx on the machine.


Here's the code for Form1. This is the code that does all the magic.

Code:

Option Explicit
'
Private Declare Function OpenProcess Lib "kernel32" (ByVal dwDesiredAccess As Long, ByVal bInheritHandle As Long, ByVal dwProcessId As Long) As Long
Private Declare Function WaitForSingleObject Lib "kernel32" (ByVal hHandle As Long, ByVal dwMilliseconds As Long) As Long
Private Declare Function CloseHandle Lib "kernel32" (ByVal hObject As Long) As Long
'

Private Sub Form_Activate()
    If Not bCompiled Then
        MsgBox "Sorry, but this entire idea is meant to be used from a compiled program."
        Exit Sub
    End If
   
    RetrieveResourceFileAndSaveToDisk App.Path, "Project2.exe.manifest", "Dependencies", True
    RetrieveResourceFileAndSaveToDisk App.Path, "mscomctl.ocx", "Dependencies", True
    RetrieveResourceFileAndSaveToDisk App.Path, "Project2.exe", "Dependencies", True
   
    'Shell App.Path & "\Project2.exe", vbNormalFocus
    ShellAndWait App.Path & "\Project2.exe", Command$
   
    On Error Resume Next ' Swallow errors so that, when we're executing two copies, this doesn't cause problems.
    Kill App.Path & "\Project2.exe.manifest"
    Kill App.Path & "\mscomctl.ocx"
    Kill App.Path & "\Project2.exe"
    On Error GoTo 0

    Unload Me
End Sub

Private Sub ShellAndWait(sProgram As String, Optional sCommand As String, Optional iFocus As VBA.VbAppWinStyle = vbNormalFocus)
    ' The WaitForSingleObject function returns when one of the following occurs:
    '  -  The specified object is in the signaled state.
    '  -  The time-out interval elapses.
    '
    ' The dwMilliseconds parameter specifies the time-out interval, in milliseconds.
    ' The function returns if the interval elapses, even if the object’s state is
    ' nonsignaled. If dwMilliseconds is zero, the function tests the object’s state
    ' and returns immediately. If dwMilliseconds is INFINITE, the function’s time-out
    ' interval never elapses.
    '
    ' This example waits an INFINITE amount of time for the process to end. As a
    ' result this process will be frozen until the shelled process terminates. The
    ' down side is that if the shelled process hangs, so will this one.
    '
    ' A better approach is to wait a specific amount of time.  Once the time-out
    ' interval expires, test the return value. If it is WAIT_TIMEOUT, the process
    ' is still not signaled.  Then you can either wait again or continue with your
    ' processing.
    '
    ' DOS Applications:
    '    Waiting for a DOS application is tricky because the DOS window never goes
    '    away when the application is done.  To get around this, prefix the app that
    '    you are shelling to with "command.com /c".
    '
    '    For example: lPid = Shell("command.com /c " & txtApp.Text, vbNormalFocus)
    '
    Dim lPid As Long
    Dim lHnd As Long
    Dim lRet As Long
    '
    Const SYNCHRONIZE = &H100000
    Const INFINITE = &HFFFF    'Wait forever
    '
    If Trim$(sProgram) = "" Then Exit Sub
    If Len(sCommand) Then
        lPid = Shell("""" & sProgram & """ " & sCommand, iFocus)
    Else
        lPid = Shell("""" & sProgram & """", iFocus)
    End If
    If lPid <> 0 Then
        lHnd = OpenProcess(SYNCHRONIZE, 0, lPid)      ' Get a handle to the shelled process.
        If lHnd <> 0 Then                              ' If successful, wait for the application to end.
            lRet = WaitForSingleObject(lHnd, INFINITE)
            CloseHandle lHnd                          ' Close the handle.
        End If
    End If
End Sub

Private Sub RetrieveResourceFileAndSaveToDisk(sFilePath As String, sFileName As String, sResourceType As String, Optional bOverwriteIfExists As Boolean = True)
    ' Loads the specified file from the .RES (or .EXE) and then saves it to disk.
    Dim bb() As Byte
    Dim sSaveSpec As String
    '
    ' Build filespec.
    If Right$(sFilePath, 1) = "\" Then
        sSaveSpec = sFilePath & sFileName
    Else
        sSaveSpec = sFilePath & "\" & sFileName
    End If
    '
    ' Check if the file exists.  Get out if it does and we don't want to overwrite.
    ' It saves time and memory to go ahead and do this first.
    If bFileExists(sSaveSpec) Then
        If Not bOverwriteIfExists Then Exit Sub
        On Error Resume Next ' Swallow errors so that running two copies won't cause problems.
        Kill sSaveSpec
        On Error GoTo 0
    End If
    '
    ' Actually retrieve and save the file.
    SaveResourceFileToDisk LoadResourceFileFromName(sFileName, sResourceType), sSaveSpec, bOverwriteIfExists
End Sub

Private Function LoadResourceFileFromName(sResourceName As String, sResourceType As String) As Byte()
    ' Loads the specified data file resource from the current project's resource (.RES) file, actually the .EXE once compiled.
    '  sResourceName        Specifies the unique name of the data file resource.
    '  sResourceType        Optional. Specifies the "type" of data file being returned.  The Visual Basic default for data files is "CUSTOM".
    '
    ' Will error if not found.  Note that CASE doesn't matter in the LoadResData call.
    ' However, spaces are not allowed in resource names, so they are removed.
    LoadResourceFileFromName = LoadResData(Replace$(sResourceName, " ", ""), sResourceType) ' Returns a Byte array.
End Function

Private Sub SaveResourceFileToDisk(DataArray() As Byte, sSaveSpec As String, Optional bOverwriteIfExists As Boolean = True)
    ' This function takes the specified data file in the form of a BYTE array and saves it out to the specified file.
    '
    ' sSaveSpec            Specifies the full path of the file to save out to.
    ' DataArray            Specifies the BYTE array that represents the data file to save out.
    ' bOverwriteIfExists  Optional. If set to TRUE and the file specified in the "sSavePath" parameter already
    '                      exists, the existing file will be overwritten with the new one.  If set to FALSE, the
    '                      existing file is left alone and the specified data file is not written out.
    '
    ' Return FALSE on error, TRUE if successful.
    Dim FileNum As Integer
    Dim sFileName As String
    Dim i As Long
    '
    ' Check if the file exists
    If bFileExists(sSaveSpec) Then
        If Not bOverwriteIfExists Then Exit Sub
        On Error Resume Next ' Swallow errors so that running two copies won't cause problems.
        Kill sSaveSpec
        On Error GoTo 0
    End If
    '
    sFileName = Mid$(sSaveSpec, InStrRev(sSaveSpec, "\") + 1)
    '
    ' Save the information to file.
    FileNum = FreeFile
    On Error Resume Next ' Swallow errors so that running two copies won't cause problems.
    Open sSaveSpec For Binary As #FileNum
    Put #FileNum, 1, DataArray()
    Close #FileNum
    On Error GoTo 0
End Sub

Private Function bFileExists(fle As String) As Boolean
    On Local Error GoTo FileExistsError
    ' If no error then something existed.
    If Len(fle) <> 0 Then
        bFileExists = (GetAttr(fle) And vbDirectory) = 0
    Else
        bFileExists = False
    End If
    Exit Function
FileExistsError:
    bFileExists = False
End Function

Private Function bCompiled() As Boolean
    On Error Resume Next
    Debug.Print 1 / 0
    bCompiled = Err = 0
    On Error GoTo 0
End Function

Here's a picture of my Form1:

Name:  Form1.gif
Views: 90
Size:  9.3 KB

Regarding adding the files to the resources of Project1, I chose to make a "Dependencies" category type for these kinds of files. The following is a screen-shot of my resource editor (from within VB6) after the files are added to the project:

Name:  res.gif
Views: 86
Size:  12.6 KB

Note that none of this applies when executing the program from within the VB6 IDE, and I've put checks in for that.

Also, there may need to be a tad more error checking in some of the code. For instance, if you attempt to execute a second copy of Project1.exe before the first one has terminated, you'll run into problems. I'll leave it to you to sort that one though. (Or maybe I'll come back later and do that.) Fixed this. It now works fine even if you want/need to execute two simultaneous copies.

Another enhancement would be to "pass through" any command line arguments received by Program1 into Program2. That's a pretty easy enhancement, and maybe I'll do it later. Fixed this. Any command line arguments passed into Program1 will be passed through to Program2.

Here's a copy of Project1.exe all compiled, with Project2.exe, Project2.exe.manifest, and mscomctl.ocx all wrapped up into it. It's just what's outlined above all compiled. Download it here if you like. Any fixes after the initial post will probably not be included in this executable.

Best Of Luck to Everyone,
Elroy

EDIT1: Also, everything in that Project1 (and Form1) is probably better done in a Sub Main and a project that has no user-interface. I just did it this way for illustration purposes.

EDIT2: If your project needs other ActiveX (OCX) controls, I've posted a .manifest file that covers the more commonly used OCX controls here.
Attached Images
   

DPI-Aware WireFrame (RC5- and vbWidgets-based)

$
0
0
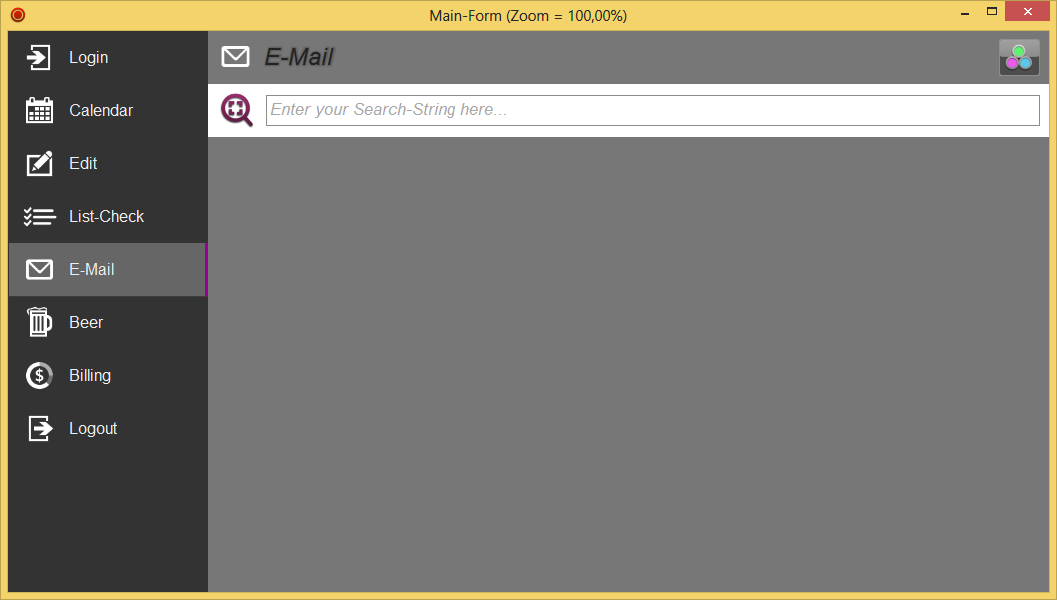
Just a little "Base-example" one could build upon, to produce a modern looking and DPI-aware GUI...
(as requested by bPrice and Carlos in this thread here: http://www.vbforums.com/showthread.p...ke-this-in-VB6)


The Demos Main-Form is made up of several "Panels" (hWnd-based Child- cWidgetForms),
which in turn can then host any additional Widgets...
The Hierarchy is:
cfMain (managing the Panels)
... cpLeft (the Panel with the vertical Menu, using ownerdrawing on a cwVList)
... cpTop1 (the Panel at the very top, only hosting an Icon, a Title and the FullScreen-Button so far)
... cpTop2 (a second Top-Panel, currently showing a kind of "permanent Search-Bar")

A cpMain-Panel which would cover the remaining MainForm-area was left out - since in a real App
one would probably define and load several cpMain-Panel-Classes (one for each Entry in the Left-Menu) -
and then change (Load/Unload or Show/Hide) them due to Left-Menu-Selections.

<Ctrl>+<MouseWheel> will change the Zoom-Factor dynamically.

Here's the Demo-Source:
ModernAppWireFrame.zip

Olaf
Attached Files

GUID To Path - find out which files are being referred to by a GUID->

$
0
0
GUID To Path is a program that attempts to determine which files are being referred to by a GUID. Simply provide one or more GUIDs and click "Search". A list of the GUIDs specified by the user and any associated files should appear along with some information about the GUIDs.

Example result for the GUID "{BD84B380-8CA2-1069-AB1D-08000948F534}" (found in "C:\Windows\Fonts\Desktop.ini" file):

{BD84B380-8CA2-1069-AB1D-08000948F534} (CLSID)
InprocServer32 = "%SystemRoot%\system32\fontext.dll"
Attached Files

Reflexivity (instantiating object from their name in a string) in VB6

$
0
0
This is code I've been working with over the last few days, making sure it works perfectly. It's about as clean as I'm going to get it, so it's time to post it here.

As credits, this work originated from some work by firehacker, and was originally shown to me by The Trick. Therefore, they (particularly firehacker) deserve a great deal of credit in the derivation of this module.

The code below is to be placed into a standard (BAS) module, and this module must have a name of modNameBasedObjectFactory (from the module's properties). You can change this if you like. However, if you do, find this line of code and change it there as well...

Code:

  Const MeModule = "modNameBasedObjectFactory"
To use it is quite simple. Place it in a standard (BAS) module with that name, and then call CreateObjectPrivate. You might call it like this...

Code:

Dim cls As Class1
Set cls = CreateObjectPrivate("Class1")

This would essentially be identical to...

Code:

Dim cls As Class1
Set cls = New Class1


Notice that it works quite differently in the IDE than it does in an executable. In the IDE, it can rather easily take advantage of the EbExecuteLine API function found in the "vba6.dll". However, this option isn't available in the executable. Therefore, it must find the lpObjectInfo pointer for the project, which is where the work is. Once that's known, the "__vbaNew" function in the msvbvm60.dll can be called to instantiate the object. Just FYI, the msvbvm60.dll is part of the VB6 runtime, and should be present on all later versions of Windows.

The IdeCreateInstance and ExeCreateInstance functions are also declared as Public, but you should have a specific reason to call these. It's probably best to just always use the CreateObjectPrivate function so that the code can correctly sort out which way to do it.


To build a demo, place the code in your modNameBasedObjectFactory named BAS module, throw a class or two (or 10) into your project, and then instantiate it (or them) from a string using CreateObjectPrivate.

Code:

Option Explicit
'
Private Declare Function EbExecuteLine Lib "vba6.dll" (ByVal pStringToExec As Long, ByVal i1 As Long, ByVal i2 As Long, ByVal fCheckOnly As Long) As Long
'
Private Declare Function lstrcmpi Lib "kernel32" Alias "lstrcmpiA" (ByVal s1 As String, ByVal s2 As Long) As Long
Private Declare Function ExeNew Lib "msvbvm60" Alias "__vbaNew" (lpObjectInfo As Any) As IUnknown
Private Declare Function ArrayPtr Lib "msvbvm60" Alias "VarPtr" (ary() As Any) As Long
Private Declare Sub GetMem4 Lib "msvbvm60" (ByVal lpAddress As Long, dst As Any)
Private Declare Sub PutMem4 Lib "msvbvm60" (ByVal lpAddress As Long, ByVal nv As Long)
'
Private Type EXEPROJECTINFO
    Signature                      As Long
    RuntimeVersion                  As Integer
    BaseLanguageDll(0 To 13)        As Byte
    ExtLanguageDll(0 To 13)        As Byte
    RuntimeRevision                As Integer
    BaseLangiageDllLCID            As Long
    ExtLanguageDllLCID              As Long
    lpSubMain                      As Long
    lpProjectData                  As Long
    ' < There are other fields, but not declared, not needed. >
End Type
'
Private Type ProjectData
    Version                        As Long
    lpModuleDescriptorsTableHeader  As Long
    ' < There are other fields, but not declared, not needed. >
End Type
'
Private Type MODDESCRTBL_HEADER
    Reserved0                      As Long
    lpProjectObject                As Long
    lpProjectExtInfo                As Long
    Reserved1                      As Long
    Reserved2                      As Long
    lpProjectData                  As Long
    guid(0 To 15)                  As Byte
    Reserved3                      As Integer
    TotalModuleCount                As Integer
    CompiledModuleCount            As Integer
    UsedModuleCount                As Integer
    lpFirstDescriptor              As Long
    ' < There are other fields, but not declared, not needed. >
End Type
'
Private Enum MODFLAGS
    mfBasic = 1
    mfNonStatic = 2
    mfUserControl = &H42000
End Enum
'
Private Type MODDESCRTBL_ENTRY
    lpObjectInfo                    As Long
    FullBits                        As Long
    Placeholder0(0 To 15)          As Byte
    lpszName                        As Long
    MethodsCount                    As Long
    lpMethodNamesArray              As Long
    Placeholder1                    As Long
    ModuleType                      As MODFLAGS
    Placeholder2                    As Long
End Type
'
Private Type SafeArrayOrigType
    ArrayName As String
    pvDataOrig As Long
    cElementsOrig As Long
End Type
'
Private SafeArrayOrig() As SafeArrayOrigType
Private SafeArrayOrigCount As Long
'

Public Function CreateObjectPrivate(ByVal Class As String) As IUnknown
    '
    ' When you work in the compiled form and the different mechanisms will be used by the IDE.
    If InIDE Then
        Set CreateObjectPrivate = IdeCreateInstance(Class)
    Else
        Set CreateObjectPrivate = ExeCreateInstance(Class)
    End If
End Function

Public Function IdeCreateInstance(ByVal Class As String) As IUnknown
    ' Only for IDE.
    '
    If Not InIDE Then
        MsgBox "This only works while in the IDE."
        Error 5
        Exit Function
    End If
    '
    ' If the module this is in is renamed, it MUST be changed here as well.
    Const MeModule = "modNameBasedObjectFactory"
    '
    EbExecuteLine StrPtr(MeModule & ".OneCellQueue New " & Class), 0, 0, 0
    '
    Set IdeCreateInstance = OneCellQueue(Nothing)
    If IdeCreateInstance Is Nothing Then
        Err.Raise 8, , "Specified class '" + Class + "' is not defined."
        Exit Function
    End If
End Function

Private Function OneCellQueue(ByVal refIn As IUnknown) As IUnknown
    ' Returns what was "previously" passed in as refIn,
    ' and then stores the current refIn for return next time.
    '
    Static o As IUnknown
    '
    Set OneCellQueue = o
    Set o = refIn
End Function

Public Function ExeCreateInstance(ByVal Class As String) As IUnknown
    ' Only for Executable.
    '
    Dim lpObjectInfo As Long
    '
    If InIDE Then
        MsgBox "This does not work while in the IDE."
        Error 5
        Exit Function
    End If
    '
    ' Get the address of a block of information about the class.
    ' And then create an instance of this class.
    ' If a class is not found, generated an error.
    '
    If Not GetOiOfClass(Class, lpObjectInfo) Then
        Err.Raise 8, , "Specified class '" + Class + "' is not defined."
        Exit Function
    End If
    '
    Set ExeCreateInstance = ExeNew(ByVal lpObjectInfo)
End Function

Private Function GetOiOfClass(ByVal Class As String, lpObjInfo As Long) As Boolean
    ' Only for Executable.
    '
    ' lpObjInfo is a returned argument.
    ' Function returns true if successful.
    '
    Dim Modules()        As MODDESCRTBL_ENTRY
    Dim i                As Long
    '
    ReDim Modules(0)
    LoadDescriptorsTable Modules
    '
    ' We are looking for a descriptor corresponding to the specified class.
    For i = LBound(Modules) To UBound(Modules)
        With Modules(i)
        If lstrcmpi(Class, .lpszName) = 0 And CBool(.ModuleType And mfNonStatic) And Not CBool(.ModuleType And 0) Then
                lpObjInfo = .lpObjectInfo
                GetOiOfClass = True
                Exit For
            End If
        End With
    Next i
    '
    SafeArrayUnMap ArrayPtr(Modules), "Modules"
End Function

Private Sub LoadDescriptorsTable(Modules() As MODDESCRTBL_ENTRY)
    ' Only for Executable.
    '
    Dim lpEPI              As Long
    Dim EPI(0)              As EXEPROJECTINFO
    Dim ProjectData(0)      As ProjectData
    Dim ModDescrTblHdr(0)  As MODDESCRTBL_HEADER
    '
    ' This procedure is called only once for the project.
    ' Get the address of the EPI.
    '
    If Not FindEpiSimple(lpEPI) Then
        Err.Raise 17, , "Failed to locate EXEPROJECTINFO structure in process module image."
        Exit Sub
    End If
    '
    ' From EPI find location PROJECTDATA, from PROJECTDATA obtain location
    ' of Table header tags, the title tags, and obtain the number of address sequence.
    '
    SafeArrayMap ArrayPtr(EPI), lpEPI, "EPI"
    SafeArrayMap ArrayPtr(ProjectData), EPI(0).lpProjectData, "ProjectData"
    SafeArrayUnMap ArrayPtr(EPI), "EPI"
    SafeArrayMap ArrayPtr(ModDescrTblHdr), ProjectData(0).lpModuleDescriptorsTableHeader, "ModDescrTblHdr"
    SafeArrayUnMap ArrayPtr(ProjectData), "ProjectData"
    ' This dt() is unmapped elsewhere.
    SafeArrayMap ArrayPtr(Modules), ModDescrTblHdr(0).lpFirstDescriptor, "Modules", ModDescrTblHdr(0).TotalModuleCount
    SafeArrayUnMap ArrayPtr(ModDescrTblHdr), "ModDescrTblHdr"
End Sub

Private Function FindEpiSimple(ByRef lpEPI As Long) As Boolean
    ' Only for Executable.
    '
    Dim DWords()            As Long ' Must be dynamic.
    Dim PotentionalEPI(0)  As EXEPROJECTINFO
    Dim PotentionalPD(0)    As ProjectData
    Dim i                  As Long
    '
    Const EPI_Signature    As Long = &H21354256 ' "VB5/6!"
    Const PD_Version        As Long = &H1F4
    '
    ' We are trying to get a pointer to a structure EXEPROJECTINFO. The address is not stored anywhere.
    ' Therefore the only way to find the structure is to find its signature.
    '
    ' Current research implementation simply disgusting: it is looking for signatures from the
    ' very beginning of the image, including those places where it can not be known. And find out
    ' behind the border of the image, if you find a signature within the virtual image failed,
    ' this will likely result in AV-exclusion. But its (implementation) is compact.
    '
    ' Basically, this is searching a memory image of the executable's base-code.
    '
    ReDim DWords(0)
    SafeArrayMap ArrayPtr(DWords), App.hInstance, "DWords"
    Do
        If DWords(i) = EPI_Signature Then
            SafeArrayMap ArrayPtr(PotentionalEPI), VarPtr(DWords(i)), "PotentionalEPI"
            SafeArrayMap ArrayPtr(PotentionalPD), PotentionalEPI(0).lpProjectData, "PotentionalPD"
            If PotentionalPD(0).Version = PD_Version Then
                lpEPI = VarPtr(DWords(i))
                FindEpiSimple = True
            End If
            SafeArrayUnMap ArrayPtr(PotentionalPD), "PotentionalPD"
            SafeArrayUnMap ArrayPtr(PotentionalEPI), "PotentionalEPI"
            If FindEpiSimple Then Exit Do
        End If
        i = i + 1
    Loop
    SafeArrayUnMap ArrayPtr(DWords), "DWords"
End Function

Private Sub SafeArrayMap(ByVal ppSA As Long, ByVal pMemory As Long, sArrayName As String, Optional ByVal NewSize As Long = -1)
    '
    ' It's important that the initial array be precisely a one element (zero based) pre-dimensioned array.
    ' It can be any array type you like.  Be careful to not Redim or Erase it before SafeArrayUnMap is called.
    '
    Dim pSA As Long
    Dim pMemoryOrig As Long
    Dim OrigSize As Long
    '
    GetMem4 ppSA, pSA
    '
    GetMem4 pSA + 12, pMemoryOrig
    GetMem4 pSA + 16, OrigSize
    '
    ReDim Preserve SafeArrayOrig(SafeArrayOrigCount)
    SafeArrayOrig(SafeArrayOrigCount).ArrayName = sArrayName
    SafeArrayOrig(SafeArrayOrigCount).pvDataOrig = pMemoryOrig
    SafeArrayOrig(SafeArrayOrigCount).cElementsOrig = OrigSize
    SafeArrayOrigCount = SafeArrayOrigCount + 1
    '
    PutMem4 pSA + 12, ByVal pMemory    ' Point to different data.
    PutMem4 pSA + 16, ByVal NewSize    ' Change the size.
End Sub

Private Sub SafeArrayUnMap(ByVal ppSA As Long, sArrayName As String)
    Dim pSA As Long
    Dim i As Long
    Dim j As Long
    Dim pMemoryOrig As Long
    Dim OrigSize As Long
    '
    ' This MUST be found.  No error checking.
    For i = 0 To SafeArrayOrigCount - 1
        If SafeArrayOrig(i).ArrayName = sArrayName Then
            pMemoryOrig = SafeArrayOrig(i).pvDataOrig
            OrigSize = SafeArrayOrig(i).cElementsOrig
            If SafeArrayOrigCount = 1 Then
                Erase SafeArrayOrig
            Else
                For j = i + 1 To SafeArrayOrigCount - 1 ' Won't run if last one.
                    SafeArrayOrig(j - 1) = SafeArrayOrig(j)
                Next j
                ReDim Preserve SafeArrayOrig(SafeArrayOrigCount - 2) ' Both the one we're deleting, and zero based.
            End If
            SafeArrayOrigCount = SafeArrayOrigCount - 1
            Exit For
        End If
    Next i
    '
    GetMem4 ppSA, pSA
    PutMem4 pSA + 12, ByVal pMemoryOrig
    PutMem4 pSA + 16, ByVal OrigSize
End Sub

Private Function InIDE() As Boolean
    On Error GoTo InTheIDE
    Debug.Print 1 / 0
    Exit Function
InTheIDE:
    InIDE = True
End Function

I'm not entirely sure who might need this. But the question of reflection has come up in these forums several times before, and I've never seen anyone successfully answer it. So, here it is.

Also, this is innately available in .NET as well as many other languages. I just love making sure that VB6 will do most of what other languages are capable.


Enjoy,
Elroy

GPSP: GDI+ Bitmap Downscaler

$
0
0
Introduction

This isn't particularly unique, but most of the examples I've found are either seriously flawed or wrap the same sort of thing up with a ton of extra functions your programs may not need. This one tries to trap errors and ensure the release of handles to help avoid memory leaks and other issues. It isn't perfect, and the comments cover some of the extra things that could be done.

The GPSP class (GDI Plus Scale Picture) makes use of GDI Plus Flat API calls to convert a bitmap StdPicture to a new scaled StdPicture. It can be used up "upscale" as well but its main purpose is downscaling. It can be used to create ListView "thumbnail" images but it is based on a larger project related to user interface DPI scaling. That's probably its more general use case.

Since it offers StdPicture to StdPicture operations, in most cases you'll be limited to BMP, JPEG, and GIF images. It has no support for icon StdPicture and makes no effort to preserve transparency anyway. Icons can be scaled better by using a LoadIconWithScaleDown() API call instead anyway.

By doing StdPicture to StdPicture operations this class should be easy to use even for VB6 beginners.


Usage

Basically you just create an instance of GPSP, set a few properties, and call one of its two methods to scale pictures.

Set ScaledPic = GPSP.ByFactor(OrigPic) scales the picture by the Factor property. This is a value like 0.25 for 25%, 1.5 for 150%, etc.

Set ScaledPic = GPSP.ToWidthHeight(OrigPic) scales the picture to specific dimensions. These are the Width and Height properties, in pixels. It also makes use of the KeepAspect property.

If KeepAspect = True then the BackColor property also comes into serious play because the image is scaled and centered within the dimensions.

But due to edge aliasing issues you'll probably always want to assign BackColor some reasonable color. If nothing else you may want to choose something like 50% gray, i.e. &H00808080&, or in most cases the background color of the control you will display the resulting image on.

There is also the Quality property. This accepts values corresponding to the GDI+ InterpolationMode enumeration. These have comments in the code about suggested choices, but which is best varies with the source images and the scaling requested.


Two small sample projects with picture files are attached. Here is one of them:

Name:  sshot1.png
Views: 8
Size:  12.8 KB Name:  sshot2.png
Views: 9
Size:  32.5 KB


Requirements

You can drop this class into any project, it has no dependencies aside from GDI+ which we always have now anyway. If you must support something like Windows 95 (?) you should already have the GDI+ redist package. It doesn't require any special compilation process or build steps.

Or you could just extract the code you want and write your own class or use it inline within Forms and such. Some people might just strip back all of the exception handling and raise a generic exception for any failure.


Help appreciated

I'm no GDI+ expert by any means, so if anyone finds bugs I'd love to hear about them. Bug fixes would be even better. ;)
Attached Images
  
Attached Files

[VB6, Vista+] Advanced Thumbnail ListView: Icons, images, videos, framed small images

$
0
0
I was motivated by dilettante's post to finally wrap up some of the advanced techniques I use for a top-tier thumbnail preview ListView. This combines many methods that I and others have developed for generating thumbnails, and combines them to get the best results possible and having fallback options. Not for the faint of heart.

Some of the key features:
-For non-image files, either the full-sized Vista+ style icons are used, or if unavailable the smaller icon appears in a box.
-The same is done for small image files. Instead of scaling up, which looks horrible, GDI+ is used to center and frame small images.
-Supports any image/video type Explorer supports
-Shows custom folder icons at full resolution
-Thumbnails for video files can either be turned on or off (video thumbnail method by dilettante)
-Large range of thumbnail sizes are supported
-I've simplified things a little bit by doing this all with a Common Controls ocx ListView, rather than the manually created one normally used.
-Before thumbnail mode is activated, normal icon mode is shown.
-While in normal icon mode, I've incorporated my demo showing how to access and display all file overlays, instead of just the link and share ones. DropBox users rejoice!
-No external dependencies when compiled besides the Windows Common Controls, and only oleexp in the IDE.
-Includes the latest versions of my portable ListView/Header and ImageList definitions modules, current for comctl32.dll 6.1
-Gathers file information through shell interfaces, some never demonstrated in VB before now like IParentAndItem and IShellIcon.
-Option to uncomment detailed debug output to follow along the thumbnail process

Requirements
-Windows Vista or higher
-Common controls 6.0 manifest. The demo project has an internal manifest resource file for when it's compiled, but to run in the IDE your IDE must be manifested as well.
-oleexp3.tlb v3.7 or higher. Dated 13 Jul 2016; no new version was released with this project.
-oleexp3's mIID.bas addon (included in oleexp3 download, must be added to this project).
Attached Files

DDE File Associations (open multiple files with a single memory-copy of your program)

$
0
0
I wound up pulling this project together for another thread, and it wound up being fairly nice, so I thought I'd post it here.

Basically, it's for the situation where you want a single-running-copy of your program to process multiple data-files (possibly opened at different times). You may process these data-files with the MDI forms mechanism, or some other way. That's entirely up to you.

The idea/concept I'm giving you just illustrates how to make sure these data-files are all opened with one-memory-copy of your program (and not opened with a separate copy for each data-file, which is more typical of VB6 programs).

For purposes of this demonstration, I'm going to assume we're talking about a .zzz data-file type.

There are several ways that multiple data-files might be specified for opening with your program:
  1. double-click a single .zzz, but then find another and double-click it, and then again and again.
  2. select multiple .zzz files, right-click, and click "open".
  3. open a copy of your program, and then drag a .zzz file onto it, and possibly do this over and over.
  4. select multiple .zzz files, and then drag them onto an opened copy of your program.
  5. drag single .zzz files onto the program's executable in Windows explorer, and do this over and over.
  6. select multiple .zzz files, and then drag them onto the program's executable in Windows explorer.


There's one other way a .zzz data-file might be opened. You might have a Menu/File/Open... option on your program's menu. This is the one way I didn't cover. I figured you could work this one out on your own. It's all these other ways that can cause problems, possibly opening several copies of your program, rather than opening all the data-files in a single copy in memory.

Let me address the mechanisms to the file-open methods listed above (1-thru-6). For #1 & #2 to work, there has to be a file association in Windows. Furthermore, for all double-clicked files (of your type, say .zzz) to be opened in one copy of your program, the Windows registry has to be set up for this. There are several approaches, but I've chosen the DDE File Association approach. This is all rather thoroughly discussed in this thread, or you can just "think through" the mnuCheckRegistry_Click procedure in the provided source code.

Mechanisms #3 & #4 just take advantage of the OleDropMode ability of VB6 forms and controls.

Mechanisms #5 & #6 circumvent the DDE file association, and attempt to directly open the data-file with a fresh copy of the program. To inhibit this behavior, the App.PrevInstance property is used, sending the correct DDE command to the copy of the program that's already running.

That's about it. Please see the sFileTypeExtension and possibly the sFileDescription constants at the top of the Form1 code. You'll probably want to alter those for your specific needs. Also, the DoSomethingWithFiles procedure is where you'd actually do something with your files, such as maybe open each of them in a MDI child form.

Enjoy,
Elroy
Attached Files
Viewing all 1321 articles
Browse latest View live


Latest Images